
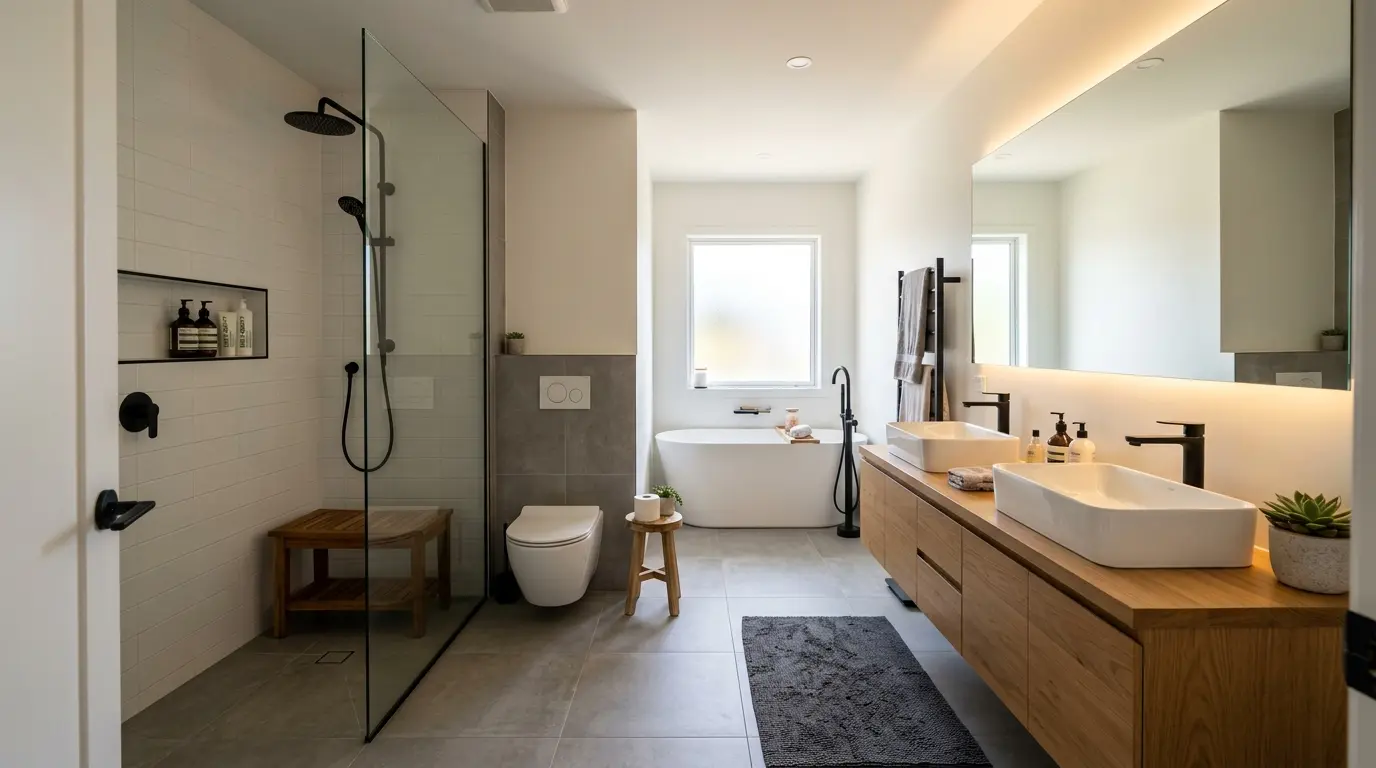
Three inches decides more about your bathroom than any finish in the showroom. Three inches of clearance beside the toilet is the difference between sitting down comfortably and knocking your shoulder on the vanity. Three inches of counter depth decides whether your drawer opens all the way or stops against the door every morning.
No single arrangement wins everywhere, which is why there is no one-size answer. The best bathroom layout is the one that fits your footprint, gives your body room to move, and works with the plumbing your building already has.
Layout carries that weight because you cannot fix it later. Tile comes off walls or fixtures swap out over a weekend. Clearances stay exactly where the pipes and walls already put them, and changing them means opening the floor, filing with the city, and asking a board for permission.
51% of renovated bathrooms finish under 100 square feet, according to the 2025 U.S. Houzz Bathroom Trends Study. That makes layout the decision everything else depends on. Bathroom remodeling in NYC tightens things further, because apartment footprints are small and the building decides where plumbing can go.
What Makes a Bathroom Layout the Best One
The best layout comes down to three things: how much room you have to move, where the plumbing can go, and how the space feels when you walk in.
Clearance Comes Before Looks
Start by checking each decision against the space a person actually takes up at each fixture:
- Standing at the sink: About 18 inches of floor depth to wash your hands, closer to 20 inches to lean forward and wash your face.
- Sitting on the toilet: Knee room in front, elbow room on both sides, measured from the middle of the fixture.
- Stepping out of the shower: Enough dry floor to dry off without backing into the vanity.
- Opening the door: A full swing with nothing in the way.
Miss any of these and the room still looks fine on paper. You just feel it twice a day, every day.
Keep the Wet Fixtures Together
Clearance shapes how the room feels. Plumbing shapes what it costs to build. Grouping the wet fixtures shortens pipe runs, reduces how much has to be opened up, and keeps waterproofing in one place:
- Toilet beside the shower: Both drain into the same waste stack.
- Vanity on the same wet wall: Supply lines stay inside one wall cavity.
- Shower or tub against an outside or party wall: Waterproofing covers one area instead of three.
What You See from the Door
Grouping takes care of the budget. What it leaves open is how the room feels the moment you walk in, and that depends on what sits in your line of sight:
- Vanity or window in view: Open and considered.
- Toilet in view: Cramped, no matter how many square feet you have.
- Shower glass in view: Your eye carries through the glass, so the floor reads longer.
The Measurements Every Bathroom Layout Starts With
All three ideas above come down to numbers, and there are two sets of them.
- Code sets the legal floor.
- National Kitchen and Bath Association guidelines set the comfortable target.
Designers aim for the second whenever the room allows it.
Bathroom Clearances
The first number is the minimum your local code requires. The second is the more comfortable size the National Kitchen and Bath Association (NKBA) recommends.
- Toilet center to wall or fixture: Minimum 15 inches, recommended 18 inches
- Open floor in front of toilet: Minimum 21 inches, recommended 30 inches
- Open floor in front of sink: Minimum 21 inches, recommended 30 inches
- Sink center to side wall: Minimum 15 inches, recommended 20 inches
- Open floor at shower entry: Minimum 24 inches, recommended 30 inches
- Shower size: Minimum 30 x 30 inches, recommended 36 x 36 inches
- Space between two sinks (center to center): No minimum, recommended 36 inches
What the Gap Between Legal and Comfortable Feels Like
Those two columns describe two different bathrooms. The difference only becomes obvious once you live in one.
At the Toilet
- 3 inches at the side: Decides whether your shoulder clears the vanity.
- 9 inches in front: Decides whether you can stand straight up or have to shuffle sideways first.
- Separate toilet room: 30 x 60 inches works. 36 x 66 inches lets the door shut behind you without a shimmy.
At the Vanity
- Counter depth: 22 inches suits a bathroom. Kitchen depth of 24 inches and up quietly eats your walkway.
- Center to side wall: Five extra inches over the minimum gives you somewhere to rest your elbow while brushing your teeth.
- Double vanity spacing: 36 inches between the two sinks keeps two people from bumping into each other on a weekday morning.
At the Shower and Tub
- Shower floor area: 900 square inches, with nothing narrower than 30 inches.
- Door opening: 22 inches clear at minimum. Anything tighter makes getting in a manoeuvre.
- Standard alcove tub: 32 x 60 inches, the size most small layouts are built around.
Door Swing and Walkway Width
Those clearances only hold if the door leaves them alone. Unfortunately, door problems usually show up during installation, which is far too late to fix cheaply.
- Entry door: 32 inches of clear width where you can manage it, 36 inches in bigger rooms.
- Swing path: No fixture, drawer front, or towel bar inside it.
- Pocket or outswing doors: Give back 6 to 9 square feet of floor in tight rooms.
- Main walkways: 36 inches anywhere two people pass each other.
Worth Knowing: The two columns do different jobs. Use the code column to prove a layout is legal. Use the NKBA column to judge whether you will enjoy living in it.
At Cucine Design NYC, layouts are planned to the recommended column wherever the footprint allows, and dropped to code minimums only where the room leaves no other choice. Book Your Bathroom Remodeling in NYC with us!
Five Bathroom Layouts That Work
Once the numbers are settled, the arrangement follows. Almost every bathroom that works well is one of these five.
Common Bathroom Layouts
- One-wall (20 to 45 sq ft): Everything sits along a single wet wall.
- Two-wall galley (40 to 70 sq ft): The vanity and toilet face the shower or tub.
- Three-wall (60 to 100 sq ft): One fixture on each wall, with the door on the fourth.
- Wet room (50 sq ft and up): A sealed wet zone at one end and a dry zone at the other.
- Split (90 sq ft and up): The vanity sits outside, with the toilet and shower behind a door.
Where Each One Earns Its Place
The table tells you what fits. What it cannot tell you is why three of these trip people up after the work is finished.
One-Wall Layouts Trade Storage for Cost
Running everything along one wet wall keeps the plumbing simple and the build cheap. You pay for that in cabinets. One wall is now carrying three fixtures, which leaves very little room for anything else, so storage has to go up the walls instead: recessed niches, a mirrored cabinet, a tall shallow unit. Skip that, and you will notice within a week.
Galley Layouts Live or Die on Width
Fixtures facing each other need 30 inches of clear aisle in between. Rooms narrower than 5 feet cannot give you that. So width is the first thing to measure, not the last, because the layout either passes the tape measure or it does not.
Wet Rooms Cost More Than They Look
Putting the shower and tub in one open zone gives you a bigger bathing area without making the room bigger, and a flat threshold helps anyone with mobility needs. However, waterproofing now has to cover the whole zone instead of one enclosure. That raises the cost, and it raises what happens if the work is sloppy.
Three-Wall and Split Layouts
Neither of these is a small-room option, since both need real square footage first:
- Three-wall: Every fixture gets its own zone and the most room to move of any layout, in exchange for longer pipe runs across more of the floor.
- Split: Solves the two-people-one-bathroom problem, though the dividing walls eat enough floor to rule it out below roughly 90 square feet.
Matching a Layout to Your Square Footage
Square footage rules out more options than taste ever will. That is why this starts with what you measured, not what you saved.
Which Layout Fits Your Bathroom Size
- Under 40 sq ft: Fits a one-wall layout. You give up a tub, deep storage, and an in-swing door.
- 40 to 60 sq ft: Fits a one-wall or galley layout. You give up a double vanity and a separate tub and shower.
- 60 to 100 sq ft: Fits a galley, three-wall, or wet room layout. You give up a separate toilet room.
- Over 100 sq ft: Fits any layout, including split. You give up very little.
Small Rooms Under 60 Square Feet
Small bathrooms reward taking things out more than arranging them cleverly. The smallest ones reward it most.
Under 40 Square Feet
- One bathing fixture: A shower at 36 x 36 inches where the room allows it.
- Shallower vanity: 18 to 20 inches gives back walking room and still leaves usable counter.
- Different door: A pocket or outswing door takes the swing out of the equation completely.
- Storage up the walls: Recessed niches and a mirrored cabinet replace anything standing on the floor.
40 to 60 Square Feet
- Check width first: 30 inches of clear aisle decides whether galley is even on the table.
- Group the wet fixtures: Toilet beside the shower keeps drainage on one stack.
- Hang everything on the wall: Floating vanities and wall-mounted toilets show more floor, and visible floor reads as space.
- Put the vanity in view: Costs nothing and changes how the room feels when you walk in.
60 to 100 Square Feet
Above 60 square feet the pressure eases and you finally get real choices. Most primary bathroom renovations land here:
- Three-wall layout: A zone for each fixture with room to move between them.
- Wet room: A big shower and a freestanding tub sharing one sealed area.
- Double vanity: Works once the wall run reaches roughly 60 inches.
- Linen storage: Tall, shallow cabinets fit without stealing walking room.
Over 100 Square Feet
At this size, space stops being the problem. A different one takes its place, and it is distance:
- Split it up: Toilet and shower behind their own door so two people can get ready at once.
- Still group the fixtures: Spreading them across a big room means long walks and longer pipe runs.
- Mark the zones: Lighting and material changes show where wet ends and dry begins.
- Use the sightline: A window, a tub, or a feature wall deserves the view from the door.
What Changes for Bathroom Remodeling in NYC
Everything above assumes you can put fixtures wherever the room allows. In an apartment, three separate authorities have a say first: your footprint, your building, and the city.
The Stack Decides Most of Your Plan
Start with the building's plumbing, because that is the one thing you cannot negotiate with. Waste stacks run vertically through the building, with bathrooms sitting above bathrooms floor by floor.
- Toilet: The hardest fixture to move, because waste lines need a slope and a pipe size that most floors cannot accommodate.
- Shower and tub drains: Can move within a limited radius, depending on how deep the floor is.
- Vanity: The easiest to move, since its supply and waste lines are smaller.
- What it means for you: Layouts that leave the toilet alone and rearrange everything around it are faster, cheaper, and far more likely to get approved.
Wet-Over-Dry Restrictions
Your building then adds a second layer on top. Most co-op and condo alteration agreements will not let you put wet areas above dry areas in the apartment below. Boards enforce this, not the Department of Buildings, which means the rule lives in your alteration agreement rather than city code.
What It Blocks
- Expanding into the next room: Pushing a bathroom wall into a bedroom or living room footprint.
- New fixture positions: Any wet fixture that lands over a dry space downstairs.
- Why boards care: Water travels down, and a bathroom over a neighbour's bedroom multiplies both the damage and the liability.
How Much It Varies
- Strictest buildings: Nothing wet moves at all, in any direction, for any reason.
- More flexible buildings: Limited movement allowed inside a defined zone.
- Where to look: Your alteration agreement and house rules, before design work starts.
Permits and Licensed Trades
City rules are the third layer, and they draw a clean line between replacing a fixture and moving one. Any work that alters, relocates, or removes piping has to be supervised by a Licensed Master Plumber, who pulls the permit and arranges inspections, according to the NYC Department of Buildings.
- No permit needed: Swapping a toilet, sink, or faucet in place, leaving the shutoff valves and fixture trap alone.
- Permit needed: Moving any fixture, adding drains or supply lines, or opening walls for new piping.
- Usual filing: Alteration Type 2, which covers system changes that leave the building's use and occupancy as they are.
- Electrical work: New circuits, moved outlets, and added lighting each have their own requirements.
Board Approval and Alteration Agreements
Board review runs alongside the city filing and often takes longer. As a result, it is the item most likely to move your finish date.
- Alteration agreement: A signed contract setting insurance limits, approved work hours, and debris removal rules.
- Insurance: Boards commonly require contractors to carry $1 million to $5 million in coverage.
- Seasonal rules: Some buildings ban major construction through the summer.
- Timeline: Approval can add several weeks before demolition even starts, so build it into your schedule from day one.
Every Cucine Design NYC bathroom starts with the building rather than the drawing. Stack position, alteration agreement, and permit scope get confirmed first, and the layout is designed inside whatever those three allow.
Why This Matters Here:
Falling for a layout before reading the alteration agreement is the most common way bathroom remodeling in NYC loses months. Find out what your building allows first. Then design inside that answer.
How to Test a Layout Before You Commit
Two checks catch nearly everything on that list while changes are still free.
Tape the Whole Thing Out
Mark the plan on your existing floor in painter's tape, then walk your actual morning through it.
- Fixture outlines: Vanity, toilet, shower, and tub, at full size.
- Door swing: The whole arc, handle side included.
- Clear floor: 21 inches in front of each fixture at minimum, 30 inches wherever you can get it.
- The walkthrough: Open the door, stand at the sink, step out of the shower, reach for a towel. Problems you cannot see on a drawing become obvious in ten minutes.
Check the Plan Against Your Building
Tape tells you the layout works for you. This second check tells you whether your building will allow it.
- Alteration agreement: Says whether any wet fixture can move at all.
- Stack location: Sets how far your drains can actually travel.
- Permit scope: Tells you if you need an Alteration Type 2 filing and a Licensed Master Plumber.
- Approval timeline: Book board review before ordering materials, never after.
When Changing the Layout Is Not Worth It
Sometimes both checks point the same way, and the answer is to leave the layout alone. About a third of renovating homeowners change their layout at all, and only 5% move the bathroom entirely, according to the 2025 U.S. Houzz Bathroom Trends Study. In other words, most people improve the bathroom they already have.
Signs the Existing Layout Should Stay
- ✗ Clearances already pass: Nothing blocks a door, no fixture crowds another.
- ✗ The toilet would have to move: Highest cost, hardest approval, longest wait.
- ✗ Your building will not allow wet fixtures to move: An alteration agreement that blocks it ends the conversation.
- ✗ Your budget is finish-limited: Money spent inside the walls buys nothing you see or touch daily.
What the Same Money Buys Instead
Leaving the layout alone frees up budget for the things you use every day.
- ✓ Storage: Recessed niches, a mirrored cabinet, and deep drawers clear every surface.
- ✓ Lighting: Sconces at mirror height fix more daily frustration than an extra foot of floor.
- ✓ Ventilation: A properly sized, properly vented fan protects everything else you paid for.
- ✓ Right-sized fixtures: A shallower vanity or a compact toilet can give back the room you were trying to gain by moving walls.
FAQs
What is the most efficient bathroom layout?
One-wall layouts are the most efficient in terms of cost and plumbing, since every fixture shares a single wet wall. Two-wall galley layouts use space best in rectangular rooms at least 5 feet wide. Which one wins depends on what you have least of: budget, square footage, or freedom to move plumbing.
What is the minimum size for a full bathroom?
Around 40 square feet holds a toilet, sink, and tub while still meeting code clearances. Smaller rooms work with a shower instead of a tub and a shallower vanity. What makes a layout legal is the clearance around each fixture, and square footage only matters because it decides whether those clearances fit.
Can I move the toilet during a bathroom renovation?
You can, though it is the hardest fixture to move, because waste lines need a slope that many floors cannot provide. Moving one requires a permit filed by a Licensed Master Plumber, and apartment buildings add board approval on top. Most projects end up better off leaving the toilet where it is and rearranging everything else.
Do I need a permit to change my bathroom layout in NYC?
Yes, any time plumbing or electrical fixtures move. Swapping a toilet, sink, or faucet in the same spot, without touching the shutoff valves or fixture trap, does not need one. Moving a fixture, adding a drain, or running a new circuit does, and apartment projects need board approval alongside the city filing.
Should I choose a tub or a shower in a small bathroom?
A shower usually wins under 40 square feet, since a 36 x 36 inch compartment fits where a 32 x 60 inch tub cannot. Keep the tub if this is the only full bathroom in the home, because buyers with young children look for one. If you have a second bathroom, going shower-only in the smaller room costs you nothing.
How long does a bathroom layout change take in an apartment?
The construction itself usually runs a few weeks. Board approval, city filing, and material lead times stretch the full timeline well beyond that, and several weeks can pass before demolition even begins. Projects that leave the plumbing where it is move noticeably faster at every stage.
Takeaway
The best bathroom layout is the one your footprint, your clearances, and your building can all support at once. Measure before you gather inspiration. Leave the toilet where the stack put it, keep the wet fixtures together, and find out what your building allows before anyone picks a fixture. Everything after that gets easier, and the finished room works on the mornings nobody is looking at it.
At Cucine Design NYC, layout planning is where every bathroom project starts. Our bathroom remodeling services in NYC are built around your real dimensions, with a four-step process covering planning, design, materials selection, and production. We specify European fixtures and cabinetry around your space, so nothing arrives that your room cannot hold.
Book a free planning session, explore our services, or visit the showroom at 6 West 20th Street to see layouts at full scale. Call +1 (212) 763-6639 to start.
Remember! You choose a bathroom layout once. You live inside that choice twice a day for the next fifteen years.